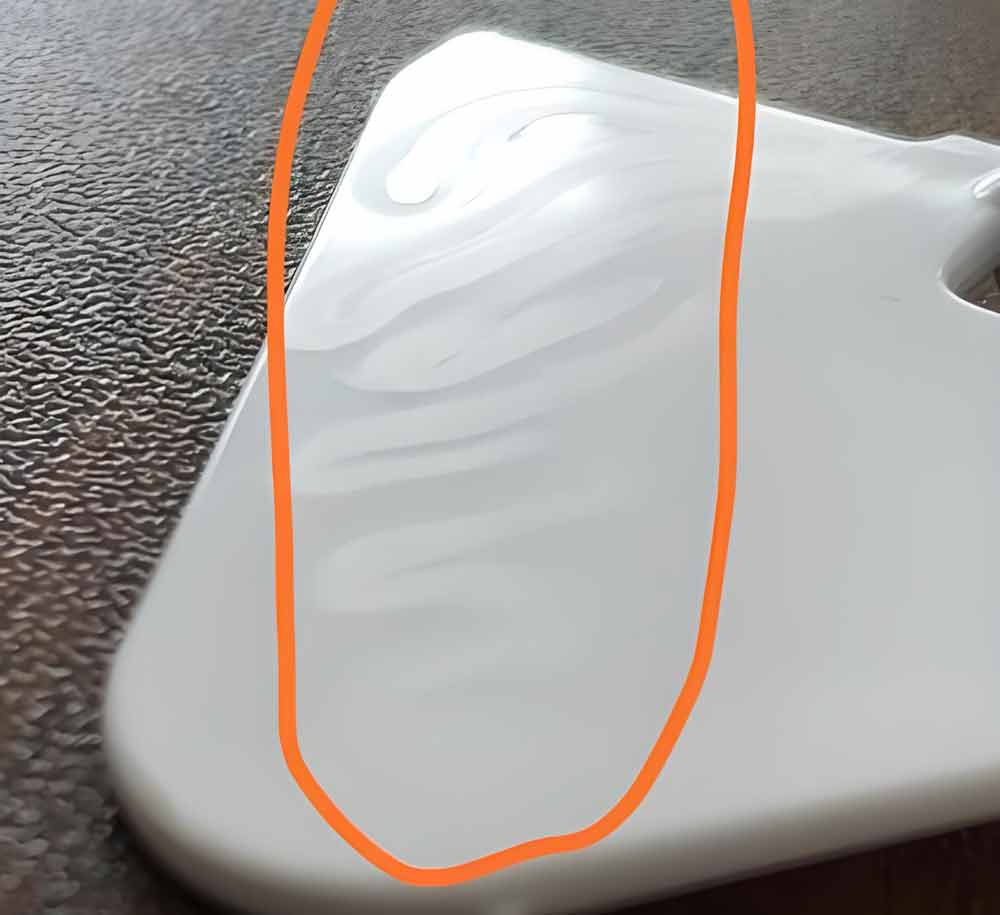
Imagine you're full of anticipation as you open the injection mold, only to find that the once-smooth surface of the part is covered with spider-web-like spray marks, just like cracks on a delicate cake. It's enough to make your blood pressure soar! Spray marks, the "number one appearance killer" in injection molding, not only lower the grade of the product but may also lead to the scrapping of an entire batch of goods. Don't panic! Today, we're presenting you with a "Mark Removal Secret Guide" to help you get to the root of the spray marks and stage a comeback!
Spray marks, scientifically known as "snake patterns" or "jetting marks," appear as snake-skin-like textures or radial marks on the surface of the part. These marks, at best, affect the appearance of the product, and at worst, weaken the structural strength of the part. In fields with extremely high surface quality requirements, such as precision electronic casings and high-end automotive interior parts, spray marks are truly the "career killers," making the product lose its competitiveness in no time.
When the plastic melt sprays out from a narrow gate at an extremely high speed, it's like a out-of-control racing car exiting a bend, creating intense turbulence. These turbulent flows cool and solidify rapidly in the mold cavity, ultimately forming spray marks. When injecting common ABS materials, if the injection speed exceeds 200mm/s, the probability of spray marks rising sharply!
A too-small gate size and an unreasonable gate position are like setting up a "single-plank bridge" for the plastic melt. After the melt squeezes through the narrow gate, it sprays due to the sudden increase in speed. In addition, if the mold has poor exhaust, the air in the cavity cannot be discharged in time, and it will "fight" with the high-speed sprayed melt, further intensifying the generation of spray marks.
Some plastic melts have a low viscosity and are too fluid, making them prone to "rampant" spraying during the injection molding process. And if the temperature of the barrel is too high, the viscosity of the melt will decrease further, making the spraying phenomenon more severe. For example, for PS (polystyrene) materials, if the barrel temperature exceeds 230°C, spray marks are likely to "show up uninvited".
Precise Speed Limitation: Reduce the injection speed by 20% - 30%, allowing the plastic melt to "enter gracefully". For materials prone to spray marks, segmented injection can be adopted: start with a low speed (50 - 80mm/s) for filling, and then increase the speed to the normal level after the melt fills the area near the gate, just like a car slowly exiting a bend and then accelerating smoothly.
Temperature Calibration: Appropriately lower the barrel temperature by 5 - 10°C to increase the viscosity of the melt and suppress its spraying tendency. At the same time, increase the mold temperature by 10 - 15°C to make the melt cool more evenly in the cavity and reduce the spray marks caused by rapid cooling.
Gate Optimization: Increase the gate size. Increase the gate thickness by 10% - 20% and the width by 15% - 25%, making the melt flow more smoothly when passing through. Change the gate form, and adopt fan gates, sub-gates, etc. to disperse the flow direction of the melt and avoid concentrated spraying.
Enhanced Exhaust: Open exhaust grooves with a depth of 0.02 - 0.05mm in the last filling area of the mold cavity, or use breathable steel materials to make mold inserts to ensure that the air in the cavity is discharged in time and "clear the obstacles" for the melt.
Adding Additives: Add 0.5% - 1% of lubricants, such as calcium stearate, paraffin, etc., to the plastic raw materials to reduce the friction between the melt and the mold surface, making its flow more stable. It's like putting "anti-slip shoes" on the melt to reduce the spraying phenomenon.
Selecting Suitable Materials: Give priority to plastic materials with higher melt viscosity and moderate fluidity. For example, use PMMA (polymethyl methacrylate) to replace PS for making transparent products with high surface quality requirements, reducing the chance of spray marks from the source.
When an electronics factory produced mobile phone casings, the spray mark problem led to a yield rate of less than 60%. After adopting the above solutions, first reduce the injection speed from 220mm/s to 150mm/s and use segmented injection; at the same time, increase the gate thickness from 0.8mm to 1mm and the width from 3mm to 4mm, and also open exhaust grooves on the mold parting surface. After the adjustment, the spray mark problem was completely solved, and the yield rate soared to over 95%, successfully winning a large order!
Don't let spray marks become the "roadblock" on the production path! Master these three killer moves, and you can easily eliminate spray marks in injection molding, making your products excel in both appearance and quality and standing out in the market competition!


